Tuesday, 27 November 2018

Volume Two: Work Commenced

Well, it's been a long time between drinks, but I've finally commenced work on Volume Two.
I am currently penciling the pages for Chapter One which tells the story of the 2nd Brigade's role in the Second Battle of Krithia 8 May 1915.
Here is an image of part of a penciled page:


Saturday, 24 June 2017

Here is a recent review of The Anzac Legend by David Read, curator of the 9th Battalion Facebook page. I was delighted to read this - 

"Book Recommendation - The ANZAC Legend by Dave Dye
The absolutely brilliant Graphic Novel - The ANZAC Legend by Dave Dye is now available as a digital download (PDF file) for only $7.99!! (that could be $USD, I can't access my transactions to confirm, but if it is, it will be about $10AUD so still cheap as chips!) I already have it in print form but I had to snap it up at that price. I do a lot of reading on my Surface Pro 4 nowadays so I've added it to my growing library of E-Books.
For those of you unfamiliar with this brilliant work, The ANZAC Legend is a 'Graphic Novel' written and drawn by outstanding Australian author Dave Dye, an ex-W02 with 28 years service in the Australian Regular Army. He started work full time on the book after his Discharge and put in more than 5000 hours on it.
Now, I'm not usually a fan of comics, anime, manga and all that. The last 'comics' I read were Commando, Battle and Action war comics back in the early 80's so I wasn't convinced I could get into a 'Graphic Novel'. But I was woefully wrong. The book was absolutely awesome! I couldn't put it down. I've been reading everything I could get my hands on about Gallipoli for literally decades. I've read every page of Bean's Official Histories (several times!), and all the more modern works by Kit Denton, Peter Hart, Peter Fitzsimmons, Patsy Adams-Smith, Les Carlyon, Peter Stanley, David Cameron, John Laffin and a few others who's names escape me right now. They are all fantastic works and for years I've read and looked at those old black and white photo's and hand drawn maps with their names like Bloody Angle, the Nek, Quinn's, Courtney's and Steele's, Dead Mans Ridge, the Chessboard, Boltons Ridge, Lone Pine etc.
But, reading The ANZAC Legend did something that none of those books ever did for me, it gave me a real 'Diggers eye view' of what the terrain actually looked like, how it would have been seen on April 25th by those 3rd Brigade Diggers that landed in the pre-dawn darkness, how hostile the terrain was to them and those that landed later in the day and tried to make their way to the Firing Line.
Dave Dye visited Gallipoli twice and made extensive models to ensure that all of his drawings were as accurate as possible. Each scene is carefully detailed so that your view at that point in time at that part of the battle is exactly how it would appear in real life. You can see what Diggers dug into the forward slope of a ridge would see. You can see how advancing Australians looked to the Turks firing down into them. This book was the very first to make it all 'click' in my mind and how it all actually fitted together. Something just looking at text and name labels on old flat black and white photo's can't convey.
The story briefly covers the leadup to the war not only in Australia but also in New Zealand and touches in what was going on in Europe as well, the departure of the 1st Convoy and the AIF's training in Egypt. But the meat of the book is all about the Landing on April 25th in fantastic detail. Even for people who consider themselves 'well read' on April 25th you will learn something from this or come away with a new appreciation for what happened on that day. Events up to around May the 5th is covered in this book but the strong focus is really April 25th 1915.
I cannot recommend the book highly enough. It's available only in two different print versions - the original 'Landscape' version and the new 'Portrait' version. And its also available as a Digital PDF Download for your PC, Android/iPad Tablets, Surface/Surface Pro's and all Laptops/PC's etc
Here is a link to the Print version:
Here is a link to the PDF Digital Download version:
If you are at the Australian War Memorial it is also available to purchase in their bookshop.
*Images from the book below used with permission from the Author
PLEASE LIKE AND SHARE THIS POST wherever you can! Get the word out about this great book!"

Thursday, 4 May 2017

Now in Hardcover and available worldwide

The Anzac Legend: A Graphic History Hardcover

ISBN:  9780992482626

The process of reformatting the landscape book to portrait has been completed. Now 246 pages long and a few updates and edits to text. It has also been divided up into chapters.

The book is now hardcover and is available internationally from many online bookstores - select the link to go to the site that suits you Amazon, Barnes & Noble, Abe Books, Book Depository and many others.

For Australian buyers there is also Booktopia,
and also of course at my website Wotsleft Books

Check out the images below. It has turned out very well, and I'm very happy with the end product.

Front cover


Back Cover

Tuesday, 26 April 2016

New format

Over the past two years since The Anzac Legend was first published (boy, that's gone quick!) I've had some feedback which has made me look at changing the book from landscape to portrait format.

I chose the original landscape format because it was the best for showing the broad maps which are a large part of the books success, but the portrait format is the preferred format for book-sellers and libraries to display the book on their shelves. After some initial trials I found that I could rearrange the panels without too much hassle.

It is a slow process, and a slight reduction in panel sizes, but generally I'm pleased with the result, and the pages look good.


Some pages are not as easily or neatly arranged as the panels are of various sizes and shapes; but with a little work I manage to get them together OK.
.

Sunday, 13 March 2016

The Turkish Defence at Anzac

I have come across this fantastic book by Mr Mesut Uyar called "The Ottoman Defence Against The Anzac Landing" published 2015.

This is the book I was looking for while I was researching  The Anzac Legend. It's a pity it was published after my book. It gives great insight into the Ottoman Army and it's pre-Great War development.
Of most interest to me was the revelations of Kemal's movements during the day of 25 April 1915, and also the involvement of the 72nd and 77th Regiments. Previous books I've read did not clearly and sensibly outline these important parts of the battle.
I recommend this book to anyone who wants the latest good oil on the Ottoman Army side of the battle. Apart from all the background info, unfortunately it only covers the day of the Landing in detail.

Saturday, 24 October 2015

Book feedback

I recently received an email from Baron Tonis Breidel Hadjidemetriou, M.A., Ph.D. ( a Cypriot historian living in Greece) who was kind enough to write to me telling me of his thoughts on The Anzac Legend. Follow the link to read what he has to say : 
 http://wotsleftbooks.weebly.com/testimonials.html


Monday, 20 April 2015

The ANZAC Plan

A century ago the ANZACs were preparing to land on the Gallipoli Peninsula, north of Gaba Tepe, while the British and French were planning to land at the mouth of the Dardenelles at Cape Helles and Kum Kale.
The British 29th Division was to land at the beaches code named S, V, W, X and Y.


They were planning to land on the 23rd of April 1915, as this would give the Covering Force more time to land safely in the darkness between moon set and dawn. The threat of enfilading fire on the landing beach from Gaba Tepe concerned General Birdwood, so this would be mitigated by landing in darkness.
Then on the 20th of April, a strong storm blew in and kicked up the water in Mudros Harbour. It became too dangerous for the the required transfers between the troopships, so the landing was put off.
Now they waited for the wind to die down. With each succeeding day the moon set later and reduced the time of darkness for the landing of the Covering Force. If they waited too long the moon would set after dawn and there would be no chance of surprising the waiting Turks. Birdwood's plan would be ruined. He waited anxiously.


Tuesday, 14 April 2015

Preparations for the Anzac Landing

100 years ago - the Allied forces (British and French) gathered in Mudros harbour, Lemnos Island and prepared for the upcoming invasion of the Gallipoli peninsula.


This drawing shows the beach  with low ridges behind, where the Anzac Covering Force was supposed to land. It also shows Gaba Tepe on the right like a fort covered with steep grassy slopes, topped by trenches and barbed wire. The position of Gaba Tepe made the planners anxious because of its potential to expose the landing force to Ottoman enfilade fire.


Friday, 3 April 2015

4th April 1915

In Egypt one hundred years ago, on the 4th of April 1915, the 1st Australian Division and the units of New Zealand Expeditionary Force who combined to make the Australian and New Zealand Army Corps (ANZAC) were at this commencing to sail northwards across the Mediterranean Sea from Alexandria. Their destination was Lemnos Island. (Much of this is covered on page 15 of my book.)


NZ's and Australian's confront the Redcaps at "The Battle of the Wozza"
The long awaited orders to move to the Front had finally arrived on the 1st of April. After the “Battle of the Wozzer” described in an earlier post (here) the soldiers got on with the task of dismantling their tents and organising their gear for transport to Alexandria. Piles of kit bags, etc grew beside the road at Mena and Zeitoun. The once busy areas occupied by these units were now deserted. Arab shopkeepers who had set up their shops outside the camps (an occurrence still happening today outside our camps overseas) looked on bewildered, as the respective areas were tidied, emu bobbed and the rubbish burnt in big pits.  The members of the Australian Light Horse and NZ Mounted Rifles asked enthusiastically when they would be going as well. But all they got was a shake of the head; for, at this moment, only the infantry brigades were moving. Men who had been using excuses to exempt themselves from certain duties (malingering) were seen to be lining up in front of their unit RAP’s in the hope of being found fit to go with their units. Nobody wanted to miss out on the adventure, and get away from Egypt.

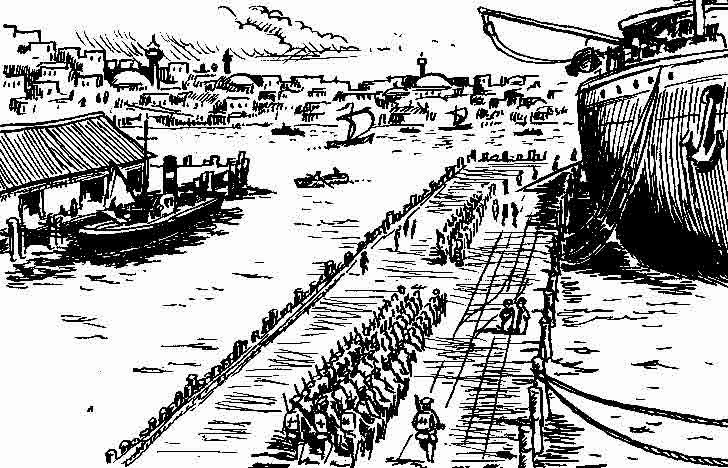
Troops embarking at Alexandria.
Throughout the night and morning of the 3rd of April as the time for the first few units to move arrived, the men formed up and marched off to the Cairo train station. It took four days to move the entire 1st Division from Mena Camp, leaving only the 3rd Light Horse Brigade, the 4th Light Horse Regiment, and a few other small units.

The news was splashed across the Cairo newspapers. Security was out the door. The whole world, including the enemy, soon new that ANZAC was moving. The men crammed onto troop trains at Cairo and were soon enroute to Alexandria. The British and French navies so dominated the Mediterranean that the ships sailed without an escort.


This proved to be sufficient, for there were not many instances where the Allied troop movements were threatened. On one occasion however on the 17 April, as the SS Manitou, carrying British 29th Division artillery units, was a day out from Lemnos, a Turkish torpedo boat, the Timur Hissar, slipped through the “net” and drew alongside. It was a time when chivalry still existed; a Turkish voice shouted “I’ll give you ten minutes to leave the ship, then I will sink you.” With that the troops aboard began to hastily man the life boats.
One boat with sixty men aboard crashed heavily into the sea smashing itself to pieces and 53 men drowned. As it turned out the Turkish torpedo boat fired three torpedoes and they all missed, then some British destroyers arrived and chased it off.


Thus it was that ANZAC was taking the last steps towards its ultimate fate. 

Thursday, 19 March 2015

Battle for the Dardanelles 18 Mar 1915

100 years ago : following on from the last post


Photo taken from Fort No 1 on the tip of Cape Helles; showing the mouth of the Dardenelles.
This a model of Killid Bahr Fort (a typical example of the forts guarding the Narrows). You can see
how strongly built they are by comparing the thickness of the walls with the width of the road. 

 
Just before the battle began Vice Admiral Carden became ill, so Vice Admiral J. de Robeck took command.


The forecast for 18 March was for fine weather, so orders were given for the armada of French and British battleships to form and commence the attack at 11 o’clock that morning.


During the earlier operations at the beginning of March, the Turks had observed that the Allied ships had a tendency to sail towards the Narrows and then turn to starboard into Erin Keui Bay, on completion of their runs.

The Turks decided to lay some mines there on the chance the Allies may continue this tactic in future assaults. It proved to be a wise move.


From Kilid Bahr Fort looking out from a gun position. There is only one ship in view here, imagine how it would have looked  with 16 huge battleships blazing away with their guns.


What a sight it must have been to see the Dardanelles crammed full of huge battleships. It is only a narrow area and once the battle commenced it would have been an awe inspiring and frightening sight.


The Allies attacked in three lines. The first and third lines each consisted of four British Royal Navy ships, and the second line consisted of four French Naval ships. These three lines were supported by another two British battleships on each flank.

I’ll let my pictures tell the rest of the story….


Wednesday, 18 March 2015

Allied Attacks on the Dardanelles Begin


As I mentioned in my last post - on the 19th of February 1915, the combined British and French Navies commenced operations to penetrate the Dardanelles.

This was carried out in a number of phases, devised by the Allied commander, Vice Admiral Cardin (Royal Navy).

First - battleships would knock out the Turkish guns of the outer forts by direct bombardment.

Second - the Turkish minefields in the Narrows would be cleared.

Third - the Navy would destroy the inner forts and defences at The Narrows.

The way would then be clear to sail to Constantinople and force the capitulation of the Ottoman Empire, forcing it out of the Great War.

Note: "The Narrows" is the narrow area of the Straits where the minefields are situated.

All this sounded easy enough to certain people in high places; especially as the Ottoman Army up to this time hadn’t really put up a good show. They were defeated soundly in Egypt at the Suez Canal; and although they had made advances in the Caucasus, against the Russians, now they were experiencing reversals. So an attack on the Dardanelles was considered to be a bit of a cake walk.

The Australian troops used to meet members from other units at the Furphy water cart for a drink and a yarn, Henceforth the name "Furphy" became synonymous with the spread of rumours, or "Furphies" as they became known. (my Dad's great-aunt married into the Furphy family back in 1898, My only claim to fame - DD)

Well, as it turned out, things didn’t exactly go to plan. (Who would have guessed that?)
The old Ottoman forts were extremely robust and could take an enormous pounding before any sort of damage was done. 
To help with the task of reducing the outer forts Marines of the Royal Navy landed and entered a few of them destroying the guns. These operations proved successful at Sed el Bahr and Kum Kale, which were the fortified areas at the mouth of the Dardanelles. The marines re-embarked and the Turks returned to reoccupy and bolster the defences of the forts; making them more difficult to assault.
Bad weather blew in and further attacks by the Allied Navies were put on hold. When they resumed and re-attacked the outer forts it was found that the Ottoman defences were now more prepared; and the Marines landing by sea, were repulsed.


It was decided to move on to the next phase – Clearing the minefields.
The British brought fishing trawlers down from the North Sea and fitted them out to act as minesweepers. These set out at night to clear the mines under cover of darkness; however the Turks had powerful searchlights set up illuminating the Narrows, which made the task very dangerous for the civilian crews.

These civilians jacked-up (understandably) and refused to carry on, so the Royal Navy crewed the trawlers and tried again. After a few nights it was decided to call it off, as they were not achieving their goals.


It had been nearly a month since the offensive began and pressure from London caused Cardin to rush onto the next Phase – an all-out assault by a large number of Allied battleships. This attack would be unstoppable and a tremendous show of French and British power to the enemy. It would commence at the next break in the weather.